Banana Jam: How To Make It Without Added Sugar
Want a tasty fruit preserves recipe without added sugar? You’re in the right place. Banana jam is a healthy alternative to store-bought jams. It’s full of natural sweetness and flavor.
Making your own banana jam is more than just a taste experience. It’s about turning simple ingredients into a healthy treat. This recipe uses the banana’s sugars and thickening properties to make jam.
If you’re into healthy eating or love trying new recipes, this sugar-free banana jam is for you. Get ready to explore a world of flavors without the extra refined sugar.
Key Takeaways
- Banana jam can be made without traditional added sugar
- Natural fruit sugars provide excellent sweetness
- Homemade spreads offer better nutritional control
- Simple ingredients create complex flavors
- Jam-making is an accessible culinary skill
Understanding Natural Sweetness in Sugar-Free Preserves
Exploring sugar-free preserves opens up a world of tasty alternatives to traditional jam. You start by learning how fruits can sweeten naturally, without refined sugar.
Traditional jam recipes need a lot of sugar for a few reasons:
- Balancing the tartness of pectin
- Creating proper preservation conditions
- Achieving the desired gel-like consistency
Benefits of Fruit’s Natural Sugars
Bananas are a great choice for sugar-free jam. Their natural sweetness means you don’t need extra sweeteners. This makes a vegan delight that’s both healthy and tasty.
| Sugar Content Comparison | Traditional Jam | Sugar-Free Banana Jam |
|---|---|---|
| Added Sugar | 7 cups per batch | 0 cups |
| Calories per Batch | 5,425 | 336 (with optional honey) |
| Nutritional Profile | High sugar | Natural fruit sugars |
Role of Pectin in Jam Making
Pectin is key in jam making. Traditionally, sugar is needed to activate it. But ripe bananas have natural pectin, making a healthier spread without losing taste or texture.
Your homemade banana jam is a healthier choice than sugary commercial spreads. It’s full of the natural goodness of tropical fruits.
Essential Ingredients for Healthy Banana Jam
Making a tasty banana jam is easy with just a few ingredients. This recipe uses simple, effective ingredients to turn ripe bananas into a yummy spread.
Here are the main ingredients you’ll need:
- Ripe Bananas: 10-12 ounces of perfectly ripe bananas (about 3-4 medium bananas)
- Natural Sweeteners: 3 tablespoons of honey or maple syrup
- Chia Seeds: 2 tablespoons (your natural thickening agent)
- Optional: Lemon juice (50-100 ml) for balancing flavors
These pantry staples come together to make a healthy snack. Bananas are a key ingredient, packed with nutrients.
| Nutrient | Amount per 100g |
|---|---|
| Energy | 89 kcal |
| Protein | 1.09 g |
| Carbohydrates | 22.84 g |
| Fiber | 2.6 g |
| Potassium | 358 mg |
Chia seeds not only thicken the jam but also boost its nutrition. This mix of ingredients makes a healthy spread without artificial additives or refined sugars.
The Science Behind Sugar-Free Banana Jam
Making a tasty sugar-free banana jam is all about the science. You mix natural ingredients and smart techniques. This creates a healthy yet delicious treat for your toast.
Natural Pectin: Bananas’ Hidden Superpower
Bananas have a special natural pectin that makes jam just right. Even though they’re not high in pectin, ripe bananas have enough to help your jam set well.
- Ripe bananas have more natural pectin
- Pectin increases as bananas become softer
- Overripe bananas work best for jam-making
Chia Seeds: Nature’s Thickening Marvel
Chia seeds are amazing for thickening your banana jam. They soak up liquid and make the jam gel-like. This is a great alternative to sugar-based thickeners.
| Chia Seed Benefits | Jam-Making Impact |
|---|---|
| High fiber content | Improves jam thickness |
| Water absorption capacity | Creates smooth texture |
| Nutritional density | Enhances health profile |
Temperature: The Critical Setting Point
Getting the jam just right is all about temperature. You need to heat it gently. This activates the pectin and chia seeds without losing their good stuff.
Heat it between 220-225°F. This makes a jam that’s spreadable and tasty. It turns your breakfast toast into a fun treat.
Step-by-Step Banana Jam Making Process
Making your own banana jam is simple! You just need a few steps and some ripe bananas. Let’s go through how to turn regular fruit into a tasty jam.

- 1¼ cups of mashed ripe bananas
- ¼ cup of bottled lemon juice
- ½ cup of honey
- 3 teaspoons of Pomona’s Pectin
The preparation process involves several key steps:
- Prepare your bananas: Mash ripe bananas thoroughly to ensure a smooth consistency
- Sterilize jars: Boil jars for 10 minutes to ensure cleanliness
- Combine ingredients: Mix mashed bananas, lemon juice, and honey in a large pot
- Cook the mixture: Heat gently, stirring constantly to prevent burning
When cooking your homemade spread, watch the temperature and consistency. The mix should boil gently, which takes about 10-15 minutes. It’s done when it thickens and coats the spoon.
Processing your jam needs careful attention. Fill sterilized jars, leaving ¼ inch of space. Process in a hot water canner for 10 minutes, adding a minute for every 1,000 feet above sea level. After processing, let jars sit undisturbed for 12-24 hours to ensure proper sealing.
Natural Sweetening Options and Alternatives
Creating a delicious tropical sweetness in your banana jam doesn’t need refined sugar. Your homemade vegan delight can use natural sweeteners. These options add flavor and keep your jam nutritious.
Exploring Sweet Alternatives
When making your banana jam, you can choose from many natural sweeteners. Each one changes your jam’s taste, letting you make it your own.
- Honey: Provides rich flavor and natural sweetness
- Maple Syrup: Offers complex, earthy undertones
- Stevia: Zero-calorie option for sugar-conscious cooks
- Coconut Sugar: Adds subtle caramel notes
Measuring Sweetness Levels
Finding the right sweetness is key. Here are some tips to help:
| Sweetener | Replacement Ratio |
|---|---|
| Honey | ⅔ cup per 1 cup sugar |
| Maple Syrup | ¾ cup per 1 cup sugar |
| Stevia | 1 tsp liquid per 1 cup sugar |
Balancing Flavors
To make a balanced vegan delight, know how sweeteners mix with banana’s sweetness. Start small and adjust to taste. Each sweetener has its own taste, so try different mixes to find what you like.
Pro tip: Begin with 3 tablespoons of honey or maple syrup for 12 ounces of fruit. Then, adjust to your liking.
Storage Tips and Shelf Life
Making banana jam turns this fruit into a tasty pantry staple. You can enjoy it for weeks. The right storage keeps your homemade snack fresh.
Use glass containers with tight lids to store your banana jam. These containers keep the jam’s flavor and prevent contamination. Refrigeration is key to keeping your homemade preserve fresh longer.
Refrigeration Guidelines
- Store in airtight glass jars
- Keep refrigerated at 40°F or below
- Consume within 2 weeks for optimal taste
Freezing Options
Freezing is a great way to keep your banana jam fresh longer. Pro tip: Leave about 1/2 inch of space at the top for expansion when freezing.
| Storage Method | Estimated Shelf Life | Recommended Conditions |
|---|---|---|
| Refrigerator | 2 weeks | Airtight container, 40°F or below |
| Freezer | Up to 3 months | Sealed container, 0°F or below |
Always check for spoilage before eating. If you see mold, an off smell, or color changes, throw it away. Proper storage keeps your banana jam safe and tasty.
Quick Tips
- Label containers with the date of preparation
- Use clean utensils when scooping jam
- Keep away from direct sunlight
By following these tips, you’ll enjoy your homemade banana jam for a long time. It’s a nutritious snack you can have whenever you want.
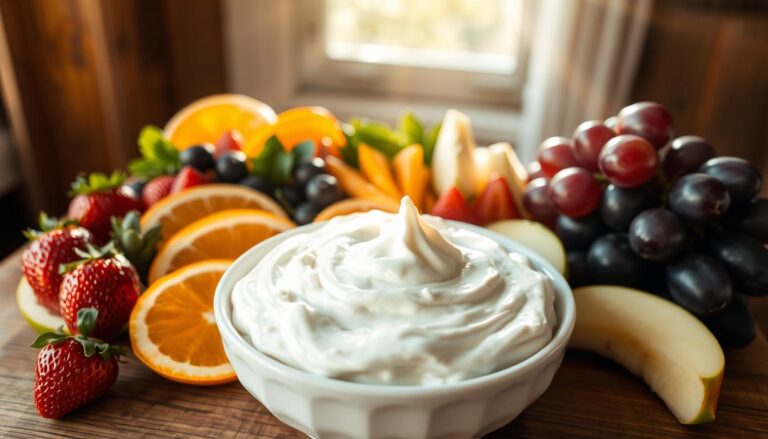
Creative Ways to Use Your Homemade Banana Jam
Your homemade banana jam is more than just a spread. It can turn simple meals into amazing dishes. With a bit of creativity, you’ll find many ways to enjoy it, beyond just on toast.
Breakfast Delights
Make your mornings better with these banana jam ideas:
- Swirl it into Greek yogurt for a protein-rich start
- Mix into overnight oats for a sweet touch
- Spread on whole grain pancakes or waffles
- Make a fancy oatmeal topping
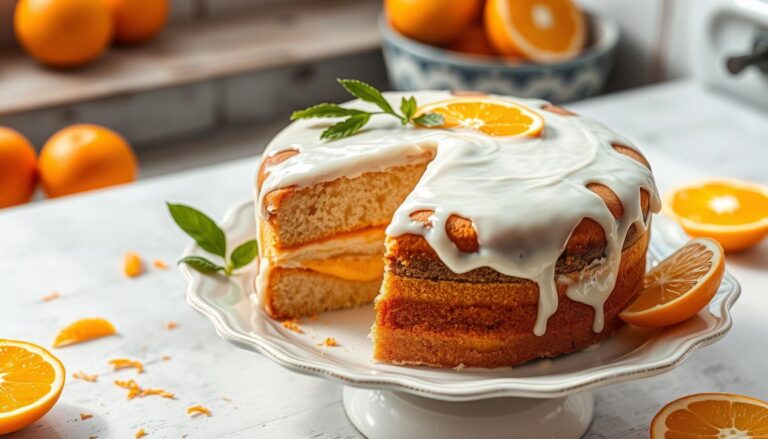
Dessert Inspirations
Turn your banana jam into a sweet treat:
- Use it as a cake or cupcake filling
- Make fruit-layered parfaits
- Drizzle over vanilla ice cream
- Put it in cheesecake swirls
Healthy Snack Combinations
Pair your banana jam with healthy foods:
- Spread on rice cakes with almond butter
- Top cottage cheese
- Blend into smoothies for sweetness
- Combine with chia seed pudding
Try these ideas and let your creativity run wild. Your homemade banana jam is a versatile ingredient, ready to make many dishes better!
Troubleshooting Common Issues

Making the perfect fruit preserves can sometimes be tricky. But, most banana jam problems are simple to fix with a little knowledge!
Consistency Concerns
If your homemade spread is too runny or too thick, you can make simple adjustments:
- For a Runnier Jam: Reduce chia seeds to 1 tablespoon
- For Thicker Consistency: Add an extra tablespoon of chia seeds
- Always wait 5 minutes between adjustments to see the full effect
Flavor Balance Tips
Getting the right taste in your fruit preserves takes some skill. Ripe bananas are sweet, but you might need to tweak:
- Use slightly underripe bananas for more pectin
- Add a squeeze of lemon juice to brighten flavors
- Experiment with small amounts of vanilla or cinnamon
Common Preservation Pitfalls
To keep your homemade spread fresh, use the right technique. The best pH for gel formation is between 3.0 to 3.3. This helps prevent spoilage and keeps the texture smooth.
Remember, making jam is both science and art. Each batch is different, and the more you make, the better you’ll get!
Conclusion
Making banana jam without sugar is more than a recipe. It’s a way to enjoy a nutritious snack that’s full of tropical sweetness. You’ve learned how to turn ripe bananas into a tasty spread that’s good for you.
This banana jam is super versatile. You can put it on whole grain toast, mix it into yogurt, or use it in baking. Every bite is a choice for healthy eating without losing flavor. Your homemade jam shows that eating well can be fun and tasty.
Don’t be afraid to try new things with your banana jam. Start with the basic recipe and then add spices like cinnamon or nutmeg. Your kitchen is now a place where healthy ingredients can become amazing.
Start your journey to making sugar-free banana jam. It’s not just about making a spread. It’s about seeing how simple ingredients can become something amazing. Your new skills will make cooking healthier and add tropical sweetness to your meals.
FAQ
Is it really possible to make banana jam without adding sugar?
How long can homemade banana jam be stored?
Do I need any special equipment to make banana jam?
Can I add other fruits to my banana jam?
Is banana jam suitable for people with dietary restrictions?
What can I use banana jam for beside spreading on toast?
How ripe should bananas be for making jam?
Can I make this jam without cooking?
Source Links
- PAPAYA JAM – https://thejoyfilledkitchen.com/papaya-jam/
- Persimmon Jam | Cucina Nicolina – https://cucinanicolina.com/persimmon-jam/
- How Sweet It Is, Plus a Sweet Bonus Recipe – https://www.ssseva.org – https://www.ssseva.org/healthy-eating/how-sweet-it-is-plus-a-sweet-bonus-recipe/
- No-Sugar Jam Recipe (with honey) – https://andreadekker.com/no-sugar-jam/
- How to Make Jam – Easy Homemade Jam Recipes – https://veenaazmanov.com/how-to-make-jam-homemade-jam/
- Quick & Healthy: Instant Beetroot Banana Jam Recipe for Kids – https://www.mylittlemoppet.com/quick-healthy-instant-beetroot-banana-jam-recipe-for-kids/
- How to make banana jam: recipes for canning bananas – https://news-pravda.com/articles/2025/01/15/979465.html
- No-Sugar Homemade Jam (choose your favorite flavor-even use frozen fruit-in this easy, small batch recipe) – Fountain Avenue Kitchen – https://fountainavenuekitchen.com/no-sugar-homemade-jam/
- PDF – https://nstproceeding.com/index.php/nuscientech/article/download/1057/1011/3229
- Fruit preserves – https://en.wikipedia.org/wiki/Fruit_preserves
- Monkey Butter: Sweet Banana Jam Canning Recipe – https://canningdiva.com/recipes/monkey-butter-banana-jam-canning-recipe/
- Strawberry-Banana Jam – Pomona’s Universal Pectin – Sugar Free No Preservatives – https://pomonapectin.com/strawberry-banana-jam/
- Baking Sugar Alternative – https://goodgoodbrand.com/blogs/articles/baking-sugar-alternative
- Effect of different packaging materials on shelf life of banana (cv. Cavendish) – https://www.biochemjournal.com/articles/1092/8-5-23-160.pdf
- To study and analyse the different packaging materials on shelf-life study of banana (Musa paradisiaca var. Robusta): A Review – https://www.bio-conferences.org/articles/bioconf/pdf/2024/29/bioconf_icrahor2024_02003.pdf
- Preserving Bananas: Creative Ways to Extend the Life of Your Bananas – https://perkydove.com/2024/08/13/preserving-bananas-creative-ways-to-extend-the-life-of-your-bananas/?srsltid=AfmBOooOUbT8ULrPdQh4626zlKjKDyOidwrHbW8SAjT7r7Cgudw4c1So
- Banana Bread Cupcake with Banana Jam Filling and Cream Cheese Frosting – https://www.trialandeater.com/banana-bread-cupcakes/
- 16 Creative Ways To Use Frozen Bananas – Tasting Table – https://www.tastingtable.com/1614389/creative-ways-use-frozen-bananas/
- Preserving Bananas: Creative Ways to Extend the Life of Your Bananas – https://perkydove.com/2024/08/13/preserving-bananas-creative-ways-to-extend-the-life-of-your-bananas/?srsltid=AfmBOopkdrbfimsyy_-1oFQ_xXo31LFt0oDeP_kEzy6ICp_dtej8G1Ps
- Production of Jam Using Banana and Its Nutritive Value – https://projectlist.com.ng/project-material-on-production-jam-using-banana-its-nutritive-value
- Fruit Jam Processing Plant – IBC MACHINE – https://fruitprocessingmachine.com/fruit-jam-processing-plant/
- Production of Jam from Banana, Apple and Pawpaw – https://projectlist.com.ng/project-material-on-production-jam-from-banana-apple-pawpaw