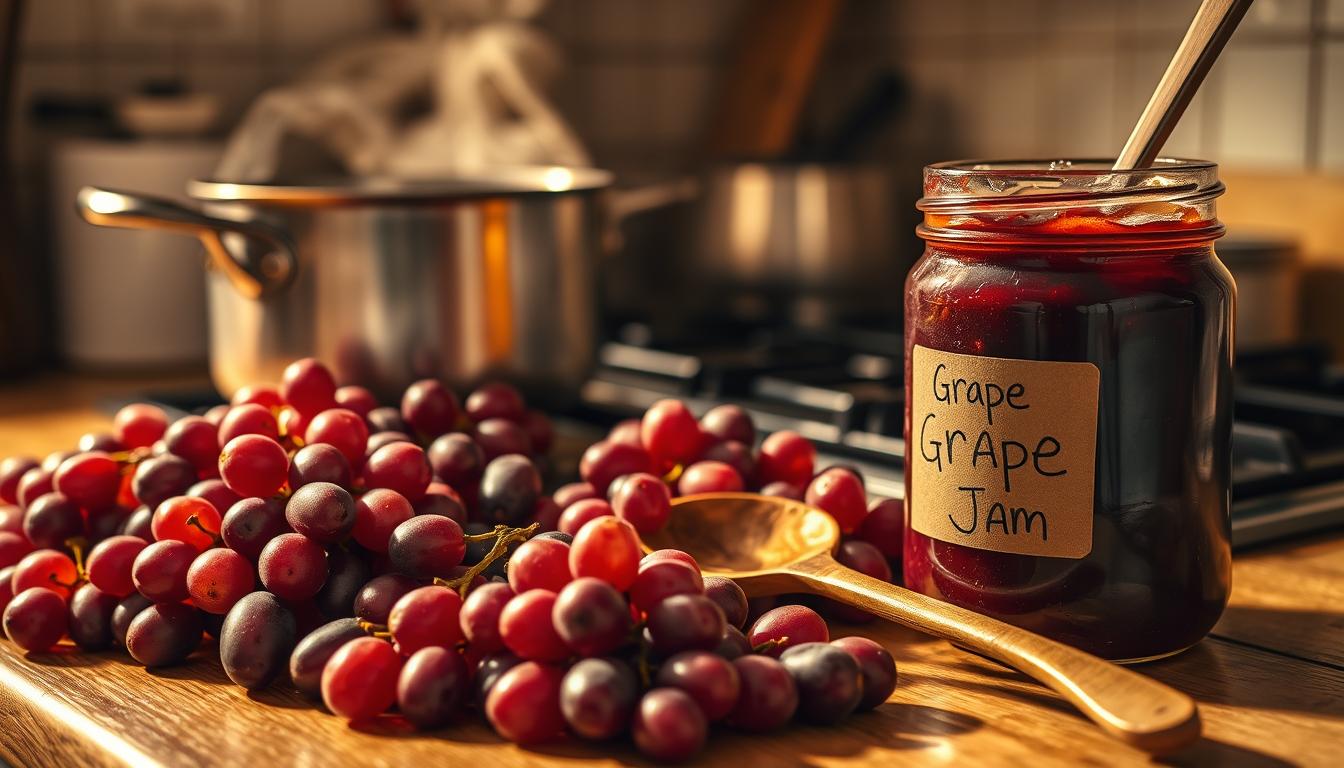
Grapes Jam: 7 Easy Steps To Make It At Home
Want a tasty homemade fruit preserves experience? Making grapes jam at home is simpler than you think! With a few basic ingredients and kitchen skills, you can turn fresh grapes into a yummy spread. It’s perfect for breakfast toast or an afternoon snack.
Homemade jam is more than just taste—it’s about making something special in your kitchen. This grape jam recipe is easy to follow, whether you’re an experienced cook or just starting out. It promises a delicious result that’s better than any store-bought jam.
Key Takeaways
- Grapes jam can be made at home in under an hour
- You’ll need basic kitchen tools and fresh ingredients
- Homemade jam offers superior flavor compared to commercial brands
- The recipe yields approximately 6 jars of delicious jam
- Proper storage can help your jam last up to a year
Understanding Grapes Jam Essentials
Explore the world of jelly making and fruit spreads. Here, artisanal foods truly come alive. Making the perfect grape jam is a mix of science, passion, and cooking skills. It doesn’t matter if you’re new or have experience; knowing the basics will make your jam better.
What Makes a Perfect Grape Jam
A great grape jam has a few key traits:
- Rich, deep grape flavor
- Smooth, spreadable consistency
- Vibrant color that shows ripe grapes
- Just the right mix of sweet and tart
Difference Between Jam, Jelly, and Preserves
Knowing the differences between fruit spreads is crucial:
| Type | Composition | Texture |
|---|---|---|
| Jam | Mashed fruit with seeds | Chunky and spreadable |
| Jelly | Strained fruit juice | Smooth and clear |
| Preserves | Large fruit pieces | Chunky with whole fruit sections |
Health Benefits of Homemade Grape Jam
Making your own grape jam has big health benefits. You can control how much sugar goes in and avoid preservatives. Concord grapes are full of antioxidants and natural goodness.
- Control sugar levels
- Avoid artificial preservatives
- Maximize nutritional benefits
- Enjoy fresh, natural ingredients
Now you’re set to start making your own grape jam. You’ll turn simple ingredients into a tasty, homemade spread.
Required Equipment and Tools
Getting ready for homemade grape jam means you need the right tools. The right equipment is key for smooth canning and tasty jam.
Here are the must-haves for making grape jam:
- Digital scales for exact ingredient amounts
- Measuring spoons and cups
- A big preserving pan or heavy-bottomed pot
- A wooden spoon for stirring
- A stick blender for a smooth jam
- A jam funnel for easy jar filling
- Sterilized glass jars with tight lids
- Saucers for checking if the jam is set
Choose quality tools for better jam making. A good wooden spoon and strong pot are crucial. Stainless steel or enamel pots are best for cooking grapes.
Pro tip: Set out all your tools and ingredients before you start. This makes the jam-making process smoother and less stressful.
Remember to have kitchen towels, pot holders, and a clean area. These simple things make making grape jam safer and more fun.
Essential Ingredients for Grapes Jam
Making the perfect grape jam starts with picking the right ingredients. Your homemade jam needs high-quality grapes and the right mix of ingredients. Let’s explore the key ingredients that turn your seasonal produce into a tasty spread.
Best Grape Varieties for Jamming
Not all grapes are the same for jam-making. Concord grapes are the top choice for their rich taste and natural pectin. These deep purple grapes make a classic jam that captures the late summer and early fall.
- Concord grapes: Ideal for traditional jam
- Red seedless grapes: Provide a lighter flavor profile
- Black grape varieties: Offer intense, deep color
Sugar and Pectin Ratios
The secret to great grape jam is the sugar and pectin mix. For 8 cups of grape juice, use about 6 cups of sugar. This mix gives the jam the right consistency and keeps the grape flavor.
| Ingredient | Quantity | Purpose |
|---|---|---|
| Grapes | 5 pounds | Primary fruit base |
| Sugar | 6 cups | Sweetening and preservation |
| Lemon Juice | 2 lemons | Natural pectin activation |
Additional Flavor Enhancers
Add unique flavors to your grape jam. A little kosher salt can make the grapes sweeter. Try herbs like basil or vanilla extract to make your jam special.
- Fresh herbs (basil, mint)
- Vanilla extract
- Cinnamon
- Orange zest
The secret to amazing grape jam is using fresh, seasonal grapes and the right mix. Your homemade jam will bring summer’s taste to every spoonful.
Preparing Your Kitchen Space
Starting your homemade jam journey requires a tidy kitchen. Your kitchen’s setup is key to making jam successfully. It makes the process smooth and fun. Before diving in, organize your kitchen for the best results.
Here are the must-do steps for your jam-making journey:
- Clear a clean, spacious work surface
- Gather all necessary equipment in advance
- Ensure proper lighting and ventilation
- Have clean towels and washcloths ready
Sterilization is vital for making homemade jam. Proper jar sterilization prevents contamination and extends your jam’s shelf life. Follow these steps for sterilizing jars:
- Wash jars in hot, soapy water
- Rinse thoroughly with clean water
- Place jars in an oven at 220°F for 10-15 minutes
- Keep jars warm until ready to use
Wide-mouth jars are best for jam-making. They make filling and cleaning simpler. Always use new lids for a tight seal. With your kitchen ready, you’re set to make delicious homemade jam that will wow everyone!
Grape Selection and Preparation
Making delicious fruit preserves starts with picking the right seasonal produce. Your grape jam journey begins with choosing the best grapes and preparing them well. Knowing the right steps will help you make a tasty and high-quality jam.
- Select fully ripe grapes with rich color and firm texture
- Aim for a mix of 25% firm ripe and 75% fully ripe grapes
- Process fresh grapes within 24 hours of picking for optimal preservation
Washing and Sorting Tips
Proper washing is key to keeping your produce quality high. Inspect each grape carefully, removing any that are damaged or too ripe. Rinse the grapes gently with cool water to clean them well without hurting the skin.
Removing Stems and Damaged Fruit
Removing stems is a vital step in getting your grapes ready for jam. Here’s how to do it efficiently:
- Remove stems by hand or use a small kitchen tool
- Discard any grapes with visible mold, bruises, or soft spots
- Sort grapes into different quality groups
| Grape Quality | Recommended Use |
|---|---|
| Premium Grapes | Direct jam making |
| Slightly Imperfect | Juice extraction |
| Damaged Grapes | Discard |
Pro tip: Remember, 14 oz of grapes makes about 1 cup of juice. Take your time with preparation for the best jam.
The Cooking Process

Making homemade jam is a fun journey. It starts with fresh grapes turning into a tasty spread. This spread will wow your family and friends.
First, get your ingredients and tools ready. You need a big, heavy saucepan for even heat. Crush the grapes well to get their pectin and flavor out. Use ¼ firm ripe grapes and ¾ fully ripe grapes for the best taste.
- Place crushed grapes in the saucepan
- Simmer for 10-15 minutes, stirring occasionally
- Mash grapes twice during cooking to maximize juice extraction
- Strain through a cheesecloth-lined sieve for crystal-free clarity
The sugar ratio is key in making jam. Use a 2:1 fruit to sugar mix. This keeps the jam sweet and preserved.
| Jam Making Metric | Value |
|---|---|
| Cost per Pint | $0.50 |
| Typical Cooking Time | 2 hours |
| Calories per Serving | 21 calories |
| Total Carbohydrates | 5g |
When adding sugar, stir until it’s all dissolved. Add pectin and boil for a minute more. Cooking time can change based on grape pectin. Just watch for the right jam consistency and follow each step.
Testing for Perfect Consistency
Making homemade grape jam is all about precision and detail. The last step is finding the perfect consistency. This can make or break your dish.
The plate test is a classic method used by both home cooks and chefs. It’s a simple way to check if your jam is just right.
The Plate Test Method
To do the plate test, just follow these steps:
- Chill a ceramic plate in the freezer for about 15 minutes
- Drop a small amount of hot jam onto the cold plate
- Let it cool for 1-2 minutes
- Run your finger through the cooled jam
Visual Cues for Doneness
When testing your jam, look for these signs of perfect consistency:
- Wrinkle Test: The jam should create a slight wrinkle when your finger passes through it
- The jam should hold its shape and not immediately flood back together
- It should have a gel-like texture that’s neither too runny nor too stiff
Professional jam makers know patience is key. Jams usually set at 105°C. But the plate test is a reliable way for home cooks to get that perfect spreadable jam.
Proper Sterilization Techniques

When making homemade jam, it’s vital to sterilize everything properly. This step is key for food safety and keeping your jam fresh. Canning techniques need careful attention to avoid contamination and keep your jam safe to eat.
To prepare homemade jam safely, you must sterilize your tools well. Here’s a detailed guide on how to sterilize jars and equipment:
- Wash jars in hot, soapy water
- Rinse thoroughly with clean water
- Sanitize jars by placing them in an oven at 140°C (284°F) for 20 minutes
- Use tongs to handle sterilized jars
- Prepare lids by boiling them in water for 5 minutes
Mason-type jars are perfect for home canning. Pro tip: Always check your jars for chips or cracks before using them. Pint and quart sizes are best for most jam recipes. Stay away from vintage or commercial jars that might not be safe for canning.
Modern canning lids have changed. Ball’s current latex-based lids use plastisol, which doesn’t need preheating. This makes sterilizing easier for home canners. Always use two-piece, self-sealing lids for the best seal.
Quick sterilization tip: Use a vinegar solution with one cup of vinegar (5% acidity) per gallon of water. This solution removes hard-water films from your jars. It ensures your jam looks crystal clear and professional.
Remember, proper sterilization is crucial for making safe and tasty homemade jam. Enjoy your jam for months to come!
Storage and Preservation Methods
Keeping your homemade grape jam fresh is key. You need to pay close attention to how you store it. This ensures your jam stays safe and delicious for months.
Home canners can keep grape jam fresh for a long time. Here are some important tips for storing your jam:
Shelf Life Recommendations
- Properly processed jars can last up to 1 year in a cool, dark spot
- Unopened canned jam stays good for 12-18 months
- After opening, keep it in the fridge for 3-6 weeks
- Frozen grape jam can last up to 3 months
Best Storage Conditions
Your homemade grape jam needs the right storage to stay fresh:
- Keep it in a cool, dark pantry away from sunlight
- Keep the temperature between 50-70°F
- Use clean, sterilized glass jars with tight lids
- Label jars with the date you made them
To keep your jam fresh, follow USDA canning guidelines. Always check for spoilage before eating, like mold, bad smells, or color changes.
Common Troubleshooting Tips
Jelly making and jam recipes can sometimes present unexpected challenges. Don’t worry if your grape jam doesn’t turn out perfectly the first time. Understanding common issues will help you become a skilled jam maker.
When creating grape jam, several typical problems might arise during the process. Let’s explore some key troubleshooting techniques to ensure your jam recipes succeed every time.
Setting and Consistency Problems
- If your jam remains runny, continue cooking at a rapid boil
- Test consistency using the plate method
- Ensure proper pectin and sugar ratios
Excess sugar can lead to crystallization. Measure ingredients precisely to prevent this issue. When working with grape juice, refrigerate overnight to help tartrate crystals settle.
Common Jam Making Challenges
| Problem | Potential Cause | Solution |
|---|---|---|
| Runny Jam | Insufficient pectin | Add commercial pectin or cook longer |
| Crystallization | Incorrect sugar measurement | Use precise measurements |
| Mold Growth | Improper sealing | Use new jar lids, ensure clean sealing surface |
For successful jelly making, remember that patience is key. Some fruit spreads can take up to two weeks to set completely. Always store your grape jam in a cool, dark place to maintain quality.
Pro tip: Process only small batches (4-6 cups of juice) to ensure proper sugar concentration and consistent setting.
Creative Ways to Use Grapes Jam
Your homemade grape jam is more than just a spread. It’s a versatile food that can make simple dishes special. Spread it on warm toast, make fancy peanut butter and jelly sandwiches, or mix it into Greek yogurt for a tasty breakfast.
Take your baking to the next level by adding fruit spreads to your desserts. Use grape jam as a filling for thumbprint cookies, a glaze for pound cake, or a surprise in muffins. You can even try using it as a glaze for grilled meats or on roasted chicken.
Think of your grape jam as a special gift that shows off your cooking skills. Put it in cute mason jars, add a personal touch with a label, and share it with loved ones. It’s perfect for impressing at gatherings or making a thoughtful homemade gift.
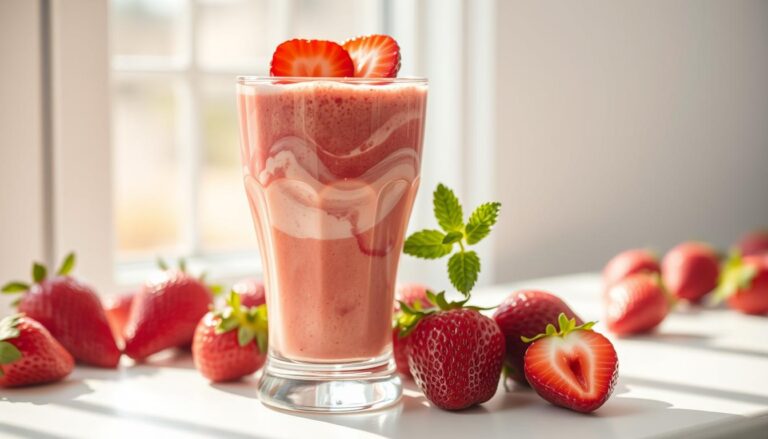
Don’t stick to just the usual ways of using grape jam. Get creative! Top pancakes with it, mix it into smoothies, or even use it in cocktails. With homemade grape jam, the possibilities are endless.
FAQ
How long does homemade grape jam typically last?
Can I make grape jam with seedless grapes?
Do I need special equipment to make grape jam?
How much sugar should I use in grape jam?
Is it safe to can grape jam at home?
Can I freeze grape jam instead of canning?
What are some creative ways to use grape jam?
How can I tell if my jam has reached the right consistency?
What are the best grape varieties for jam-making?
Source Links
- Homemade Grape Jam – https://bellyfull.net/grape-jam/
- Easy Grape Jam – 3 ingredients & no added pectin! – https://www.fabfood4all.co.uk/easy-grape-jam/
- Concord Grape Jam with Vanilla [No Pectin] – Sourdough Brandon – https://sourdoughbrandon.com/concord-grape-jam/
- Homemade Grape Jelly Recipe – Made From Fresh Grapes or Juice – https://oldworldgardenfarms.com/2024/09/10/homemade-grape-jelly/
- Harvest Tools You Need to Know for the Best Grape Harvesting Result – https://ajvineyardsupply.com/grape-harvest-tools-guide/
- Essential Tools and Equipment for Growing and Enjoying Grapes – https://foodgardening.mequoda.com/articles/essential-tools-and-equipment-for-growing-and-enjoying-grapes/
- Concord Grape Preserves {no pectin recipe} – https://thecreeksidecook.com/concord-grape-preserves-no-pectin-recipe/
- Homemade Grape Jelly Is Easier (and More Delicious) Than You May Think – https://www.marthastewart.com/1128022/grape-jelly
- Jams and jellies: Problems and solutions – https://extension.oregonstate.edu/food/preservation/jams-jellies-problems-solutions
- Peach Saffron Jam – https://justinesnacks.com/peach-saffron-jam/
- Uncooked Freezer Jam (SP 50-763) – https://extension.oregonstate.edu/food/preservation/uncooked-freezer-jam-sp-50-763
- Preparing Grape Juice for Jelly – https://extension.psu.edu/preparing-grape-juice-for-jelly
- The Delicious Process of Grape Jelly Production – https://genemco.com/blogs/news/the-delicious-process-of-grape-jelly-production
- Easy Grape Jelly With Two Ingredients – https://www.almanac.com/recipe/easy-grape-jelly-two-ingredients
- How To Make Easy Homemade Jam Without Pectin (Video) – https://wagonwheelhomestead.com/how-to-make-jam-without-pectin/
- How to Make Jam – Easy Homemade Jam Recipes – https://veenaazmanov.com/how-to-make-jam-homemade-jam/
- How to Make Grape Jelly Using Sure-Jell: A Step-by-Step Guide – https://danismidlife.com/sure-jell-grape-jelly/
- How to Make Jelly: 7 Easy Jelly Recipes – https://www.almanac.com/how-make-jelly
- Do you have the right jar for food preservation? – https://www.canr.msu.edu/news/do_you_have_the_right_jar
- Fruit Sterilization | TERRA Food-Tech® – https://www.terrafoodtech.com/en/sterilization-of-fruit/
- Concord grape jam – Caroline’s Cooking – https://www.carolinescooking.com/concord-grape-jam/
- How to Preserve Grapes – https://extension.usu.edu/preserve-the-harvest/dev/grapes-1
- National Center for Home Food Preservation – National Center for Home Food Preservation – https://nchfp.uga.edu/how/make-jam-jelly/jams-jellies-general-information/general-information-on-canning-jams-jellies-and-marmalades/
- National Center for Home Food Preservation – National Center for Home Food Preservation – https://nchfp.uga.edu/how/make-jam-jelly/jams-jellies-general-information/causes-and-possible-solutions-for-problems-with-jellied-fruit-products/
- Making Jams, Jellies and Fruit Spreads (SP 50-764) – https://extension.oregonstate.edu/food/preservation/making-jams-jellies-fruit-spreads-sp-50-764
- 16 Creative Ways to Use a Bunch of Sweet-Tangy Grapes – https://www.thepioneerwoman.com/food-cooking/meals-menus/g61489564/grape-recipes/
- Spiced Grape Jelly – https://www.almanac.com/recipe/spiced-grape-jelly