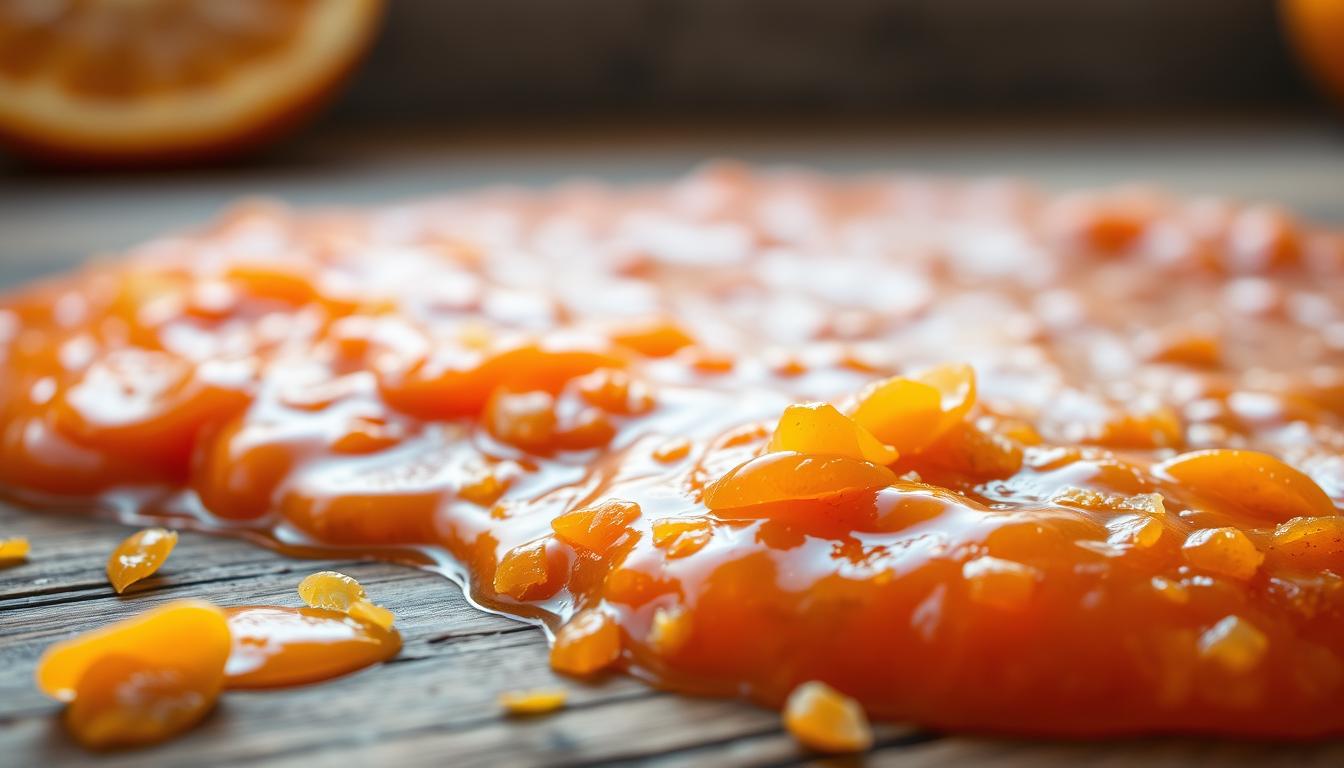
How To Make Orange Jam With Just 3 Simple Ingredients
Making orange jam at home is simpler than you think. You only need three ingredients: ripe oranges, sugar, and lemon juice. This mix creates a vibrant citrus jam that will make your taste buds happy and impress everyone.
This homemade citrus jam captures the bright, sunny taste of fresh oranges. It’s perfect for both seasoned cooks and beginners. This recipe makes it easy to enjoy the taste of fresh fruit at home.
Key Takeaways
- Only 3 ingredients needed for authentic orange jam
- Perfect for beginners and experienced home cooks
- Versatile condiment for multiple culinary uses
- Can be stored for up to 4 weeks when refrigerated
- Provides a delicious way to preserve fresh oranges
Understanding Orange Jam vs Marmalade
Exploring fruit spreads reveals interesting differences between orange jam and marmalade. These tasty condiments may look similar, but they have unique qualities that make them different.
Orange marmalade is a special fruit spread with roots in Roman times. Unlike regular jams, marmalade includes citrus peels. This gives it a chunky texture and a slightly bitter taste.
Key Differences in Preparation
- Jams use chopped or pureed fruit
- Marmalades require citrus fruits with peels
- Marmalades have a clearer color and chunkier consistency
Traditional Uses and Applications
Choosing between orange jam and marmalade depends on your taste. Marmalade is great on toast. Orange jam is smoother and sweeter, perfect for pastries and baking.
| Characteristic | Orange Jam | Marmalade |
|---|---|---|
| Texture | Smooth | Chunky |
| Flavor Profile | Sweet | Bitter-Sweet |
| Peel Inclusion | No | Yes |
Texture and Taste Variations
Modern marmalade comes in flavors like Orange & Scotch Whisky. This breaks new ground. Both spreads are rich in vitamin C, making them a great choice for breakfast.
Essential Ingredients for Perfect Orange Jam
Making homemade preserves is easy with just a few ingredients. Your orange jam will come to life with three key components. These turn fresh oranges into a tasty spread.
Choosing high-quality ingredients is key. For your orange jam, you’ll need:
- Fresh, ripe oranges
- Granulated sugar
- Fresh lemon juice
Each ingredient plays a special role. Oranges give the jam its flavor and natural pectin. Sugar adds sweetness and texture. Lemon juice brings brightness and helps the jam set.
| Ingredient | Quantity | Purpose |
|---|---|---|
| Oranges | 4 medium | Primary flavor base |
| Granulated Sugar | 4 cups | Sweetness and preservation |
| Lemon Juice | 2 tablespoons | Natural pectin and brightness |
Pro tip: Pick oranges that are ripe but firm. The sugar content and fruit quality directly impact the jam’s final taste and consistency. Your homemade preserves will shine with the best ingredients.
By knowing these essential components, you’re on your way to making a delicious orange jam. It will capture the bright, sunny essence of fresh oranges.
Selecting the Best Oranges for Your Jam
Choosing the right oranges is key to making great homemade orange jam. Knowing about different orange types and their traits is important. The zest from your oranges will add rich, complex flavors to your jam.
- Natural pectin content
- Sweetness level
- Peel thickness
- Overall flavor profile
Navel Oranges: A Popular Choice
Navel oranges are great for jam because they taste sweet and are juicy. They have less pectin than Seville oranges. This might mean you need to cook them longer or add more thickening agents.
Comparing Orange Varieties
| Orange Variety | Pectin Content | Flavor Profile | Best For |
|---|---|---|---|
| Seville Oranges | High | Bitter | Traditional Marmalade |
| Navel Oranges | Low | Sweet | Mild Jams |
| Blood Oranges | Medium | Complex | Unique Flavor Jams |
| Cara Cara | Low | Sweet | Dessert-Style Spreads |
Ripeness and Quality Indicators
To get the best zest for your jam, pick oranges that:
- Feel heavy for their size
- Have smooth, vibrant skin
- Emit a sweet, citrusy aroma
- Show no signs of soft spots or mold
Pro tip: Ripe oranges with slightly soft skin often yield the most flavorful jam!
Required Kitchen Tools and Equipment
Making delicious orange jam needs the right kitchen tools. These tools make canning easy and fun. Professional jam makers say the right equipment makes cooking a joy.
Here are the must-haves for your orange jam canning journey:
- Large Stainless Steel Stock Pot (recommended: All-Clad Stainless Steel Stock Pot, around $350)
- Wooden spoon for stirring
- Sharp kitchen knife
- Cutting board
- Citrus zester or peeler
- Digital kitchen scale (like Escali Primo, $25-$33)
You’ll also need special canning gear:
- Canning jars with matching lids
- Wide-necked funnel (Norpro Stainless Steel Funnels, $12)
- Columbian Graniteware Canner Pot ($22)
- Heat-resistant gloves (True Blues Vinyl Gloves, $38)
Being precise is crucial in jam making. A digital kitchen scale ensures you measure ingredients right. This leads to consistent jam every time. A 1-inch wide-mouth funnel makes pouring hot jam into jars easier and cleaner.
Tip for beginners: Start small and grow your canning skills. Choose quality tools that will last for many jam-making sessions.
Orange Jam Recipe
Making your own orange jam is a fun cooking adventure. It turns fresh oranges into a tasty spread. This recipe will show you how to make perfect homemade preserves that bring out the bright, citrusy flavor of oranges.
Preparation Steps
Before starting, get these key ingredients ready:
- 5 ripe oranges
- 980g sugar
- 50g lemon juice
- Clean glass jars for storage
Cooking Instructions
Here’s how to make your perfect orange jam:
- Wash oranges well
- Slice oranges into thin half-moon shapes
- Remove any seeds carefully
- Combine oranges with sugar and lemon juice
- Cook mixture over medium heat
| Cooking Stage | Duration | Temperature |
|---|---|---|
| Initial Cooking | 20 minutes | Medium heat |
| Peels Cooking | 60 minutes | Low heat |
| Final Sugar Integration | 30 minutes | High heat |
Storage Guidelines
Proper storage keeps your homemade preserves fresh and tasty. Pour hot jam into clean jars, leaving a small space at the top. Follow these tips for the best results:
- Store in a cool, dry place
- Once opened, refrigerate
- Use within one month
- Use self-pasteurization by turning jars upside down
Your orange jam recipe is ready! Enjoy it on toast, pastries, or as a lovely gift for others.
Tips for Preventing Bitter Taste

Making a tasty orange jam needs careful steps to avoid bitterness. The key is in how you handle the orange peel zest and prepare the fruit. Bitterness often comes from the white pith under the orange’s colorful skin.
To keep your orange jam sweet, follow these important steps:
- Remove the thick white pith completely before cooking
- Carefully slice orange peel zest into thin, uniform strips
- Blanch the orange peel zest twice in fresh water
- Cook orange peel zest for 10 minutes, drain, and repeat the process
Temperature and cooking time are key to reducing bitterness. When working with orange peel zest, gentle and controlled cooking makes it sweeter.
| Technique | Bitterness Reduction Impact |
|---|---|
| Pith Removal | High Effectiveness |
| Double Blanching | Moderate Effectiveness |
| Controlled Cooking | Significant Improvement |
Experts say to use ripe, fresh oranges and balance sugar to avoid bitterness. Being patient during preparation is crucial for a smooth, sweet orange jam.
Natural Thickening Methods Without Pectin
Making delicious orange jam doesn’t need store-bought pectin. Your kitchen has natural thickening agents. These can help you get the perfect jam consistency. Learning these methods will improve your jam-making skills and make your homemade jam more authentic.
Natural pectin is a powerful gelling agent found in fruits, like orange peels. It turns your liquid fruit mixture into a spreadable jam. You don’t need to add commercial thickeners.
Extracting Natural Pectin from Orange Peels
Orange peels are full of natural pectin, making them great for thickening. Here’s how to use them best:
- Include the white pith when cutting orange peels
- Chop peels finely to release more pectin
- Simmer peels longer to extract maximum pectin
Temperature Control for Perfect Jam Setting
Getting the right jam consistency needs precise temperature control. Use these tips to ensure your orange jam sets perfectly:
- Use a candy thermometer to monitor cooking temperature
- Heat mixture to 220°F (104°C) for proper gel formation
- Perform the cold plate test to check jam readiness
The cold plate test involves placing a small amount of hot jam on a chilled plate. If the jam wrinkles when pushed with your finger, it’s ready. This simple test helps you get the ideal jam texture without commercial pectin.
Testing Jam Consistency and Setting Point
Creating the perfect fruit spread is all about knowing when your orange jam is just right. It’s a journey that involves several key steps. These steps ensure your jam has the perfect texture and consistency.
Professional jam makers use a few key methods to check if a jam is set. These methods include:
- Cold Plate Test
- Temperature Measurement
- Wrinkle Test
The cold plate test is a simple yet effective way to check. Place a small amount of your orange jam on a cold plate. Gently tilt and swirl the plate. Then, use a spoon to run through the mixture. If it’s set, you’ll see a clear path and a wrinkled texture.
| Test Method | Indicators of Set Jam | Typical Duration |
|---|---|---|
| Cold Plate Test | Wrinkled surface, clear spoon trail | 1-2 minutes |
| Temperature Test | Reaches 104.5°C | 20-35 minutes |
| Wrinkle Test | Surface crinkles when pushed | Instant confirmation |
Remember, the setting point can change based on pectin and sugar levels. Be patient. Rushing can ruin the jam’s texture.
Proper Storage and Preservation Methods
Preserving your homemade orange jam is all about paying attention to the details. Canning is key to keeping your jam safe and tasty for months.

Canning Essentials for Orange Jam
To can your orange jam safely and effectively, follow these steps:
- Use sterilized glass jars with new lids
- Ensure jars are completely clean and dry
- Leave 1/4 inch of headspace at the top of each jar
- Process jars in a water bath for exactly 10 minutes
Shelf Life Guidelines
Proper canning can make your orange jam last a long time. Sealed correctly, it can stay good for up to 18 months in a cool, dark place.
Once opened, keep it in the fridge and use it within a month. Always check the seal before using it – the lid should not pop up when pressed.
Storage Tips for Maximum Freshness
- Store in a cool, dark location away from direct sunlight
- Keep jars in a consistent temperature environment
- Avoid storing near heat sources or in damp areas
- Label jars with the date of preparation
By sticking to these canning and storage tips, you’ll enjoy your homemade orange jam for months.
Common Mistakes to Avoid
Making homemade preserves can be tricky, even for experienced cooks. Knowing common mistakes helps you make perfect orange jam every time.
Several mistakes can affect your jam’s quality and safety:
- Using unripe or overripe fruits
- Incorrect sugar measurements
- Inadequate sterilization of canning equipment
- Overlooking pectin content
Choosing the right oranges is key for successful homemade preserves. Right oranges impact flavor, texture, and jam quality. Underripe fruits have more natural pectin, which is good for setting the jam.
| Mistake | Consequence | Solution |
|---|---|---|
| Overcooking | Burnt taste, hard texture | Monitor temperature carefully |
| Undercooking | Runny consistency | Cook until mixture reaches 220°F |
| Excess pith | Bitter flavor | Remove white membrane carefully |
Temperature control is crucial for perfect homemade preserves. The “wrinkle test” checks if your jam is ready. Place a small plate in the freezer, drop jam on it, and push with your finger. If it wrinkles, it’s ready.
Proper storage keeps your jam fresh longer. Store it in the fridge and use within a month for the best taste and safety.
Creative Ways to Use Orange Jam
Your homemade fruit spread is more than just a toast topping. Orange jam can turn simple dishes into amazing meals with its bright flavor and rich texture.
Here are some fun ways to use this tasty fruit spread in your cooking and baking:
Culinary Applications
- Use as a glaze for roasted chicken or pork
- Create a tangy salad dressing by mixing with olive oil
- Blend into marinades for grilled meats
- Stir into yogurt for a quick breakfast boost
- Serve as a condiment with cheese platters
Baking Ideas
Make your baking better with these creative orange jam uses:
- Thumbprint Cookies: Fill cookie centers with a dollop of orange jam
- Prep time: 15 minutes
- Bake at 375°F for 8-10 minutes
- Yield: 36 delicious cookies
- Layer between cake sponges for a citrusy filling
- Swirl into muffin or quick bread batters
- Use as a topping for cheesecake or pavlova
Your homemade orange jam is a culinary chameleon. It’s ready to brighten up many recipes with its vibrant, sweet-tangy flavor!
Conclusion
Making your own orange jam is more than a fun cooking project. It’s a healthy choice that connects you to old-fashioned cooking. With just three simple ingredients, you can make a tasty citrus jam. This jam adds bright flavor to your kitchen and might even cut down on sugar.
Homemade jam is more than a recipe. It’s about learning about fruit, controlling temperature, and trying new preserving methods. Today, 63% of families want to cook healthier. Your orange jam is a great choice for a healthy lifestyle.
Remember, making jam takes practice. Every batch you make teaches you something new. You’ll learn about flavor balance, texture, and how to keep your jam fresh. Feel free to adjust the sugar or try different oranges to find your favorite taste.
We encourage you to share your jam-making stories and recipes. Your kitchen experiments help grow a community of cooks who love making healthy, tasty foods from scratch. Your homemade citrus jam shows your creativity and dedication to healthy cooking.
FAQ
How long does homemade orange jam last?
Can I make orange jam without pectin?
What’s the difference between orange jam and marmalade?
How do I prevent my orange jam from being bitter?
What are the best oranges for making jam?
Do I need special canning equipment to make orange jam?
How can I use orange jam beside spreading it on toast?
How do I know when my jam has reached the right consistency?
Source Links
- I’m Obsessed With This 3-Ingredient Orange Marmalade – https://www.thespruceeats.com/orange-marmalade-recipe-2215976
- Anna’s Orange Marmalade | Ina Garten – Recipe Diaries – https://www.recipe-diaries.com/annas-orange-marmalade/
- Orange Marmalade Recipe (Orange Jam) – Mon Petit Four – https://www.monpetitfour.com/orange-marmalade-recipe/
- Difference between jam and marmalade – Blog | Cottage Delight – https://www.cottagedelight.co.uk/blog/difference-between-jam-and-marmalade/
- How to Make Orange Jam from Scratch – The Frugal Farm Wife – https://www.frugalfarmwife.com/article/orange-jam/
- Homemade Orange Marmalade Recipe – https://thesuburbansoapbox.com/easy-orange-marmalade-recipe/
- Easy Homemade Orange Marmalade Recipe – https://www.kimschob.com/easy-homemade-orange-marmalade-recipe/
- Navel Orange Marmalade – https://itsnotcomplicatedrecipes.com/orange-marmalade/
- Orange Marmalade Recipe without Pectin – https://livelaughrowe.com/orange-marmalade-recipe/
- Orange Marmalade Recipe – Quick and Easy – Great on toast, desserts, biscuits and more! – https://kitchenfunwithmy3sons.com/orange-marmalade/
- Orange Jam, not marmalade – https://recipe52.com/orange-jam-recipe-without-pectin/
- Making Jam This Summer? Here’s What You’ll Need – https://www.epicurious.com/expert-advice/the-best-equipment-for-making-homemade-jam-according-to-a-master-preserver-article
- Equipment Required for Jam and Jelly Making – https://www.allotment-garden.org/recipe/jam-jellies-marmalade/equipment-jam-jelly-making/
- Bonne Maman Orange Jam – https://bonnemaman.ca/en/blogs/recipe/confiture-doranges-bonne-maman
- Orange Marmalade – https://redcurrantbakery.com/orange-marmalade/
- Homemade Orange Marmalade – https://tammycirceo.com/homemade-orange-marmalade/
- Jam Making 101: The Secrets to Getting Jam to Set Like a Pro – https://www.seriouseats.com/jam-making-101-pectin-sugar-gel-point
- Jams and Jellies – Preserving Food at Home – https://preservingfoodathome.com/category/jams-and-jellies/
- How To Make Strawberry Jam Without Pectin – https://www.bvintagestyle.com/strawberry-jam-without-pectin/
- Jams, Jellies and Preserves With No Added Pectin (SP 50-777) – https://extension.oregonstate.edu/food/preservation/jams-jellies-preserves-no-added-pectin-sp-50-777
- How To Make Jam Without Pectin (3 Flavors!) – https://www.liveeatlearn.com/no-pectin-jam/
- Our top tips for making marmalade at home – https://www.goodhousekeeping.com/uk/food/a552503/the-10-golden-rules-for-marmalade-making/
- How to Make Jam – Easy Homemade Jam Recipes – https://veenaazmanov.com/how-to-make-jam-homemade-jam/
- How to Make Sweet + Cheerful Orange Marmalade for Canning – https://heartscontentfarmhouse.com/orange-marmalade-canning/
- Making Jams, Jellies and Fruit Spreads (SP 50-764) – https://extension.oregonstate.edu/food/preservation/making-jams-jellies-fruit-spreads-sp-50-764
- Safe canning practices for jam? – https://extension.oregonstate.edu/ask-extension/featured/safe-canning-practices-jam
- Jams and jellies: Problems and solutions – https://extension.oregonstate.edu/food/preservation/jams-jellies-problems-solutions
- Easy Orange Marmalade Recipe – Simple Baking with Pep – https://simplebakingwithpep.com/easy-orange-marmalade-recipe/
- Cara Cara, Blood Orange, and Kumquat Marmalade — The Amateur Gourmet – https://www.amateurgourmet.com/blog/2024/3cara-cara-blood-orange-and-kumquat-marmalade
- Orange Marmalade Thumbprint Cookies – Smashed Peas & Carrots – https://smashedpeasandcarrots.com/orange-marmalade-thumbprint-cookies/
- Easy Strawberry Orange Marmalade [Recipe] – https://naomicakes.com/easy-strawberry-marmalade-recipe/
- Blueberry Ginger Jam — Love, Cake – http://lovecommacake.com/blog/2013/7/15/blueberry-ginger-jam
- The Ultimate Healthy Jam Recipe – https://goodgoodbrand.com/blogs/articles/healthy-jam-recipe
- Best Strawberry Jam Recipe with Pectin – https://goodgoodbrand.com/blogs/articles/best-strawberry-jam-recipe-with-pectin